My cousin recently told me that she'd never had red beans and rice. For shame! My sister-in-law got this recipe from the back of a mystery novel set in New Orleans. I've altered it a bit to give it some more flavor. It says it serves six, but I'd say it would easily serve more than that, unless you skip the rice and just eat the red beans and sausage like a gumbo, then it might only serve six. It's very filling, and it freezes really well. To thaw it back out, just put the frozen block in a pot and put it over a very low heat shifting regularly until you have enough liquid in the bottom to keep the beans from burning. Then turn the heat up to medium-ish and stir it every so often, again to make sure the beans don't burn.
Here's the original recipe with my alterations and additions in ( ) :
This recipe takes approximately 5 hours, so start it early. I started mine around 1 and we were eating around 6:30 or so. I am sure this could be accomplished in a crock pot overnight, or all day, and taste just as good, but I've never tried it. I don't think my crock pot is big enough, truthfully.
Red Beans and Rice
*1 lb Dried Kidney Beans
*2 qt Cold Water
*1 meaty ham bone or a thick slice of raw ham cut into cubes
(Instead of ham, I used smoked pork neck bones. They're about $1 lb and I had several bones leftover for soup beans or stock later. You could also use smoked turkey wings for good flavor if you're not into pork)
*1/2 lb hot sausage sliced thick (I used andoullie, but I imagine you could use ground sausage, too. It does need to be REALLY flavorful, because it's going to lose a lot of flavor to the beans and water.)
*1 bunch scallions, including green tops
*1 bell pepper
*2 stalks celery
*3 medium onions
*pinch of thyme (more like 2 or 3 good big pinches)
*4 bay leaves
*Cayenne Pepper or Tobasco Sauce (I used both... )
*Salt (liberally)
*Pepper
*White Rice - not instant
(Garlic)
(Tony Chachere's Creole Seasoning)
(Cavender's Greek Seasoning)
(Parsley)
(Oregano)
(Basil)
(Beef Boullion - 2 regular cubes)
(1 chile pepper)
I have doubled the recipe and thrown in 1 lb of black beans instead of a second lb of kidney beans, so it was a red & black beans and rice. Still fabulous. I don't like celery, but all the vegetables cook down into a flavorful mush if simmered long enough, so you can sneak all kinds of stuff to picky eaters in this dish. Even if it's still recognizable, it doesn't taste like itself anymore.
NOTE: If you are one of those people who pre-preps their veggies etc. before they cook, add an additional half hour to the cook time before smashing the beans.
If you prefer instant rice, add an additional half hour to cook time after smashing the beans.
Rinse the kidney beans twice, toss any that don't look good (discolored), and get rid of any foreign debris that might've snuck into the bag. Put beans and 2 qts of water in a big heavy pot. You need at least a gallon stock pot for this. It seems superfluous for 2 qts of water and some beans, but all your veggies are going to disintegrate into more broth, so you need the space.
Add the ham (boiling meat of choice), sausage, salt, and pepper. Put on medium heat.
While your beans are heating and soaking - chop your veggies and toss them in as you go. Add your seasonings (the original recipe calls for very little seasoning. I liberally dosed mine with some additions, and it was not overly spicy)
When the mixture boils (I had to turn mine up to a med-high heat to obtain a boil) reduce heat to a simmer, and allow to cook for 3 hours, stirring every 30 minutes (or basically when you think about it, but don't wait too long.)
Using a spoon, squash about 1/4 of the beans against the side of the pot. If they don't mash easily, try again in 30 minutes.
40 minutes after you've mashed your beans, taste and tweak the seasonings. Allow to cook for another 30 minutes while you prepare the white rice.
Ladle beans over rice and serve.
All the veggies will practically disappear, and mashing the beans thickens the broth into something like a gravy. I didn't squash enough beans, so mine was thinner than expected, but still really tasty.
If you don't add anything else to the original recipe, I definitely recommend some cajun-ish spices, and don't be afraid of salt. The beans and rice both really dull down any spices you add, so the broth has to be flavorful enough to make up for it.
The adventures of a very independent woman turned suddenly housewife and learning to live on a soldier's income.
Showing posts with label cheap. Show all posts
Wednesday, September 26, 2012
Thursday, February 16, 2012
Our Not-So-Paper-Towels and a Bag Line
What I accomplished yesterday...
I've been saying for a while that I was going to try to cut back on paper product use and disposable stuff. Cotton is the component of nearly every kitchen towel and rag in existence. It's not necessarily *the* most absorbent in t-shirt form, because there's not a lot of lift or pile, but I figured they'd make good cleaning rags, napkins, and paper towel substitutes.
What's in here?
arts and crafts,
cheap,
DIY,
easy,
homemaking,
housekeeping,
Making Do
Monday, February 6, 2012
Our Daily Bread
Most of the people I've talked to agree that baking bread is cheaper than buying it. Most people also agree that it's way better for you, since you actually know what's going into the loaves. And -- drum roll -- you can pronounce all of it. I haven't bought a loaf of store bread in over a month. I think I bought the last one back around the first of January. I can't vouch for it being cheaper, necessarily. We eat more bread now, I think. We eat it for breakfast, lunch, dessert, sometimes at dinner, as a random snack. It's just that *good*!
I have a recipe that Ms. Terri gave me. It was for sandwich bread. It was tasty and simple, but homemade bread goes stale so fast we ended up not eating it all. I didn't toss it, but it got delegated to the freezer for future use in stews or as breadcrumbs. So, I went in search of ways to make my homemade bread last longer.
I stumbled onto this: Our Daily Bread in a Crock.
If you don't want to follow the link, it's bake as needed artisan bread. It is SO GOOD!
3 c warm water
1.5 tsp dry yeast
2.5 tsp salt
6.5 c all purpose flour
Yep, that's it, Four ingredients. Mix the water, yeast, and salt. It doesn't need to activate, just toss the flour in on top of it, stir until it's just blended together and pulls into a ball. You may need more or less water, depending on weather.
I have a recipe that Ms. Terri gave me. It was for sandwich bread. It was tasty and simple, but homemade bread goes stale so fast we ended up not eating it all. I didn't toss it, but it got delegated to the freezer for future use in stews or as breadcrumbs. So, I went in search of ways to make my homemade bread last longer.
![]() |
| The two loaves made with Ms. Terri's recipe |
If you don't want to follow the link, it's bake as needed artisan bread. It is SO GOOD!
3 c warm water
1.5 tsp dry yeast
2.5 tsp salt
6.5 c all purpose flour
Yep, that's it, Four ingredients. Mix the water, yeast, and salt. It doesn't need to activate, just toss the flour in on top of it, stir until it's just blended together and pulls into a ball. You may need more or less water, depending on weather.
What's in here?
as needed baking,
baking,
bread making,
cheap,
Cooking,
DIY,
easy,
homemaking,
simple
Friday, February 3, 2012
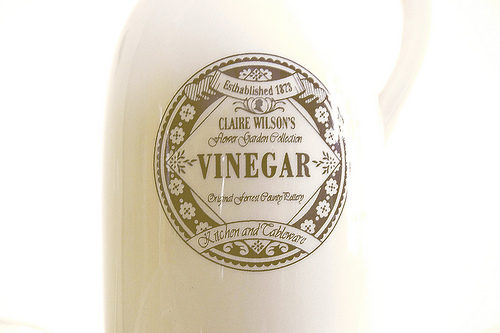
The magickal properties of plain white vinegar
I know I've been missing in action lately. I have a really good excuse! Really!
B had knee surgery recently, so I've been trying to take care of him as much as possible lately. I've learned something about myself during this period of convalescence. If he is home, I don't get nearly as much done as I usually do (or ought to). I have a tendency to want to entertain him while he's around. I know I should get off my butt and do something constructive, but it's just so much more fun to watch TV or movies, or play cards, or aggravate him... I mean, umm... mollycoddle him. Yeah...
Anyways, back to the point.
Vinegar! It's awesome stuff. My Gramma used to use it to clean with all the time, but I really didn't know it had quite as many uses as it does. I use it to clean in the kitchen, especially, because I don't trust the harsher chemical cleaners on counters and tables where I make food. I also use it on the floors, because apparently waxed hard wood does not really like chemicals all that well. They make the finish cloudy looking. Vinegar brightens it right up.
I recently bought a couple gallons of vinegar from Sam's club. It came in a cardboard box that had some interesting tips on it. I was already aware of some of these, but others were new to me. So, since the whole idea of this blogging gig is to share info and ideas, here they are:
What's in here?
cheap,
cleaning,
DIY,
easy,
homemaking,
housekeeping,
Making Do,
pest control,
pet safe,
vinegar
Tuesday, January 10, 2012
Make-do Monday - T-shirt Tote Bags
For a change, a project I didn't knit or crochet.
I love my chest freezer. It's awesomesauce. I can go to Sam's and the commissary once a month (with varying side trips to the grocery in between for the stuff that is just bound and determined to run out at off times), stick everything in my freezer and pantry, then crawl back under my rock for another month. I actually like living under a rock. Too much interaction with too many people makes me very cranky. I get cranky enough all on my own without having the additional help.
Maybe some of you out there are more disciplined than I am, but when I get home from a shopping trip and am divvying up goodies for the freezer, fridge, and pantry, the goal is to get it done and get on with something else. I usually try to at least keep plant matter on one side of the freezer and protein on the other, but it doesn't always work out that way. Then, when I am rummaging through looking for something in particular for a meal, or hunting for that leftover baggie of spaghetti sauce that I just *know* is in there, stuff gets all shuffled around, jumbled up, and becomes a right mess of frozen edibles all piled haphazardly with no semblance of order. No, there are no pictures. I didn't want a record of my slovenly freezer floating around.
I was over reading Dee's blog post about organizing her freezer, and it looked like a no-brainer. Duh... I'm supposed to be pretty intelligent, so why didn't I think to do this before? But, all of my baskets are wicker. I have too many baskets according to some, but I just keep finding things to use them for. I have a few smaller cardboard boxes floating around from packages and moving, but I could see that becoming a problem eventually, because none of them are that waxed cardboard.
Reading through the comments, I saw that one person uses those cloth shopping totes. I have fabric. I can do that!
But, I'm also not feeling motivated to make half a dozen tote bags.
But I have t-shirts and tank tops!
No... I really don't throw out nearly as much as I should. And this is a perfect example of WHY!
I have a pile of plain white and black t-shirts from my time at the sheriff's office. I still wear them, occasionally. I mean, who doesn't ever have a really scrungy job to do and they don't want to mess up any of their good t-shirts by accident, or when I dye my hair, or sometimes as a cleaning rag. But in all honesty I have too many. I don't need a dozen white t-shirts. And the tank tops... well, they haven't fit in quite some time. I keep saying one day I am going to drop enough weight to finally get into them, but the truth is, I was the smallest I've ever been (high school size) the month I moved to TX. If they didn't fit then, they're just never going to fit. And, what's a tank top but a tote bag with an unfinished bottom?
All I did for the tanks was sew the bottom hem together, and the straps became instant handles. Fabulous! Took all of a minute, and that included threading the sewing machine.
The t-shirts took a little more time. I cut the sleeves off, and then enlarged the neck to make a wider mouth for the bag.
Yes, I used black thread on the white t-shirts. It's ok, my frozen foods won't care.
All the bags wad up nice and small, so I can cram them inside each other when (LOL as if) they're not in use in the freezer. They can become shopping bags at Sam's, or wherever, and I can chuck them in the washing machine if something happens to leak, bust, or otherwise get messy. It's not quite as orderly as nice stackable baskets, but this was no additional cost to me. I had everything I needed right here at the house, and the only thing that I actually paid for at one time or another was the t-shirt itself. Since said t-shirt is five years old, and had holes worn in it, I'd say that I've already gotten more than my money's worth of wear out of it. :-)
While it may not *look* all neat and pretty, I can reach in and grab my chicken, veggies, leftovers, pork, fruit, boiling meat, etc. in one grab. The smaller odds and ends are still just in the baskets that came with the freezer, but they don't ever get any more plentiful than that. There's also a handy shelf in there that holds my beef, since I try not to cook with too much red meat for B. My freezer is so much easier to navigate now, and I didn't have to go shopping to get it that way :-) Happy day!
Now.... how long will this last?
What's in here?
arts and crafts,
cheap,
DIY,
easy,
Making Do,
projects,
Refinish and Repurpose,
sewing,
simple,
tote bag
Monday, December 5, 2011
Chicken n' Dumplings: This is for you cuz!
My cousin got to come visit a couple three years ago, and while she was staying I decided I should make chicken and dumplings. It's cheap, easy, and oh so yummy. She recently asked me how I make chicken and dumplings. I gave her a brief rundown via a social networking site, but there's nothing like a good old tutorial if you've never done something before.
Here's what you'll need:
A chicken
A pot big enough to hold the chicken and plenty of water
2c flour (plus some extra for fiddling)
1c water (for the dumplings)
Spices - whatever makes you happy.
Things I have learned through trial and error:
- The more tender your chicken is, the easier it is to get the meat off the bones.
- It really doesn't matter what kind of flour you use, what matters is how you want your dumplings.
- All purpose flour gives a chewier, firmer dumpling.
- Self-rising flour gives a fluffier dumpling and provides a little salt.
- There is no wrong way to make a dumpling, drop, tear and squish, roll and cut - it's just a matter of preference.
- It's REALLY hard to season your chicken and dumplings "wrong". You're working with a chicken and flour. That's about as blank slate as you can get in the world of dinner.
- It's really hard to cook your chicken "too long".
- You CAN cook your dumplings too long. They proceed to fall apart.
- You can freeze this, but the dumplings might change texture a bit (get softer), especially if you have soft fluffy dumplings.
- If you want to freeze it, freeze your dumplings raw, and freeze your chicken and broth separate. Then just bring to a boil, drop in your dumplings, and your done.
So you got a bird, and you got a pot. Put the bird in the pot. ;-)
Now get out those spices. Whatever you want, really. Take it tex-mex and add chili and cilantro. Go for old world and put is caraway. Give it a Caribbean flair with some allspice and ginger. Do what ya do! For an old-school Grandma's style, just put in some salt and pepper and call it good.
What you see:
- Salt
- Pepper
- Chili Pepper
- Old Bay style seasoning
- Garlic Powder
- Basil
- Parsley
- Oregano
- Allspice
- Sage
- Paprika
- Rosemary
- Tony Chechere's Creole Seasoning
- Tarragon
- Thyme
- Bay Leaves
- Worcestershire Sauce
I use a general rule of thumb about all my spices: Dust the bird's back (because I usually put it in the pot breast down) with each spice, twice with salt and pepper. By the time I'm done, I can't see the bird anymore.
This usually works out well for everything except salt. I usually end up adding a little more salt after I add the dumplings. But, it's easier to add than to take out. The Worcestershire sauce is usually a couple good shakes from the bottle.
No, potatoes aren't necessary. I wanted to use these up because they were starting to get a little soft and sprout. The onions are a good idea, but also not necessary. Some people put carrots, peas, and other veggies in their chicken and dumplings. At that point it seems to be to be more like rustic chicken soup than chicken and dumplings. Yes, I know that is splitting hairs. I am a purist. Hush!
I prefer to put my onions in from the very beginning so they cook down really soft, add flavor, and somewhat disappear in the cooking. The potatoes sort of helped thicken the broth. My chicken and dumplings have more of a broth-like sauce than a gravy. If you want gravy style, I'll get to that in a minute.
Cover it with water. Clap a lid on it, turn it up to med-high and forget about it for a little while. It's going to take that bad boy a while to reach a boil. Once it comes to a boil, reduce the heat so it won't boil over and forget about it again for a couple hours. When you check on it, take a fork or something and move the bird around by it's leg. If the bone slides out, it is safe to say the bird is fully cooked and ready to be deboned. You don't have to technically cook it that long, but it makes the broth richer. It is also easier to pull the meat off the bones if it's falling off on its own.
Use whatever means is necessary to get the chicken out of the pot and into a bowl where it can cool. Turn the heat off for now. You don't want your broth boiling down too far.
Let the bird cool enough to handle safely, then pull the meat off and put it back in the pot. The bones and skin can be saved to make stock out of.
Now comes the dumplings.
Mix your cup of water with your two cups of flour and squish. The more you squish, the chewier your dumplings are. If you want them light and fluffy, don't squish them much after the flour and water are incorporated. If you want them chewy, work in more flour and knead it till it's starts to feel rubbery and dry. (That's how I like mine.)
Bring your pot of broth and meat back to a rapid boil.
Remember, the dumplings will swell when they cook, so don't make them too big. If you decide to drop them, just pull off balls of dough and drop it in the boiling broth. If you want classic square dumplings, roll them out and cut them into rectangles or squares.
Today, I pinched dough off in balls and just squished it out in my hands. It's way less messy than rolling them out on a floured counter top.
I don't have very large hands. I guess they're average. But anyway, that gives you an idea of about the size of the dumpling before being cooked.
It only takes them a few seconds to cook, so about the time you've dropped it in it's done. Drop them in one by one so they don't stick together.
When you've dropped the last one in, you can turn the heat off and it's ready to eat.
If you want thicker gravy style broth, BEFORE you put in your dumplings, get a small bowl and put a few tablespoons of flour in it. (I say a few, 3-5, possibly even more depending on how thick you want your broth.) Get some of the hot broth and mix it into the flour until it is a thin paste. Pour the flour paste into the pot and stir it around well. It will thicken up as it boils. Now you can add your dumplings.
Enjoy!
Make your own: Laundry Soap
I snagged this from Rey at The Peasant and the Pea. So, it's been tried out by someone I personally know and trust. She got the recipe originally from Tip Nut, I believe. Anyways, all the materials cost about $8 (give or take depending on where you shop and what you buy.)
Homemade Liquid Laundry Detergent
2 quarts of water
4 cups grated bar soap
4 cups Borax
4 cups Washing Soda *washing NOT baking*
4 gallons of water
A clean 5 gallon bucket with a lid.
That does not say four bars of grated soap. It says four cups of grated bar soap. There is a fundamental difference. It only took me two and a half bars of Ivory to get my four cups of grated soap. I grated it with a very fine cheese grater.
My first question to Rey was: What the hell is washing soda and where the hell do you find it? Wal-mart apparently, and possibly the drug store, or you might have to check online. Wal-mart had it where I live in Central Texas, but they only had Arm & Hammer. I would've rather had an off label, but such is life. Borax is also something that you don't always encounter, but at least I knew what that was from my Gramma. I was also able to find it at Wal-mart. You usually find both of these ingredients near the Oxy-Clean or other laundry boosters.
I still have a good portion of each box left, though I am not sure if I have quite enough for a full second batch. I would say you can get at least one and a half batches out of each box, thus reducing the actual total cost of each batch.
Heat your 2 quarts of water to a simmer, and slowly --- very slowly --- add in your grated soap. I was using a rubber spatula to stir, and I used the rubber spatula to scoop up some soap and stir it in. Once all the first scoop of soap was dissolved, then I got another scoop. Rey discovered the hard way that if you dump all the soap in at once it melts into a lump, and you have to stir forever to melt it down. I think the total scoop/stir/melt process only took about 20 minutes. If that.
Dump your hot soapy water into your bucket, and add the Borax and Soda. Stir until it is as dissolved as it is going to get. The 4 gallons of water I added in 2 quart batches. The water needs to be hot-ish in order to dissolve everything, so I used my sauce pot and heated it up on the stove while I stirred what was already in the bucket. Not to boiling, just hotter than tap water. Stir, stir, stir. Everything will eventually get mostly dissolved. Clap the lid on it and put it by your washer. Use 1/4 c per load. Stir before each time you use it, because even though we stirred it well, solids will settle.
I got a stick from the yard for a stirrer after the water got too deep for my spatula, that way I wouldn't have to dedicate a kitchen utensil to the laundry.
Five gallons of laundry soap for less than $8. It lasted Rey (who has a family of four) for several months. She crunched the numbers over on her blog, and the results were about half as much as buying Sun laundry detergent, which is one of the cheapest ones. You can make it smell prettier by adding essential oils or soap scents (purchasable from most hobby and craft shops) if you like.
You can use the same recipe, only without the water, for a powdered detergent, but I like liquid for rinsing cleaner.
Tuesday, November 22, 2011
Fall Favorites: Tomato Soup and Grilled Cheese
What goes better with gray, chilly, drizzly weather than a hot bowl of tomato soup and a grilled cheese sandwich? Not much, other than maybe a hot bowl of homemade tomato soup, and a grilled cheese sandwich with real cheese on it instead of that processed yellow "cheese food" stuff we call American Cheese. Isn't that just a testament to our times? The quick processed, unidentifiable ingredients, imitation colored "cheese" is American cheese. We're too impatient to take the time to actually make cheese. Instant gratification and everything is disposable. It irritates the snot out of me.
Anyway, where was I? Tomato soup and grilled cheese, right.
Even if you are one of those who require instant gratification, you can have this dinner in about 20 to 30 minutes.
The recipe I used called for:
1 tsp dried Basil
3 (14.5 oz) cans diced tomatoes
3 c chicken broth
1/2 tsp salt
2 cloves garlic (or a tsp minced, or about 1/2 - 3/4 tsp dried)
2 tsp olive oil
Get a pot.
Putt the olive oil in the bottom.
Saute the garlic till it's fragrant.
Throw everything else in the pot, bring it to a boil, turn it down, and let it simmer for about 20 minutes.
You can leave it at that, or you can put the soup in a blender and puree it to get a smoother consistency. Too easy! If you don't want to use canned, you don't have to. Stewing tomatoes couldn't be easier.
Get a few tomatoes, put them in a pot, cover with water, and bring to a boil. When the skin starts to blister, turn off the heat. At this point I rinse my tomatoes in cold water. It seems to encourage blistering, and it'll keep them from continuing to cook from their own internal heat. The skins peel right off (I personally don't like cooked tomato skins. They're tough and awkward.), or you can leave them on. Dice them up, and ta da! Diced stewed tomatoes. I recommend doing the dicing in a bowl, otherwise you lose all your juices.
Some changes I plan to make to the recipe - The soup is bland. Yes I know, tomato soup isn't exactly a riot of flavors in your mouth. The store bought stuff honestly tastes about as spectacular as ketchup. (ick) But it doesn't have to be boring! Next time, I am adding some onion 1/4-1/2. I think a whole onion would be a little much for this size pot of soup. Or maybe I'll double the amount, use a whole onion, and freeze some for later. I'd also put in a shake or two of tobasco sauce, or a dash or two of red pepper. It also needs a touch more salt (for my taste). A bay leaf would be good, too.
But wait! I forgot the grilled cheese. I often make the (inaccurate) assumption that everyone has at least the basics. I consider grilled cheese a basic. It's as basic as scrambling eggs. I was three or four years old when I started learning how to scramble eggs and grill sandwiches, and I often just imagine that's how everyone does it. I am most often very mistaken, and I have to remind myself of this constantly.
Grilled Cheese:
Butter (you can use margarine, but I don't recommend vegetable oil or shortening. It just doesn't taste good and seems to leave the sandwich much greasier)
Bread
Cheese - any kind of cheese will work. Have fun with it, combine several cheeses, make a pizza grilled cheese with pepperoni on it. Shredded cheese doesn't work out as well, though, because it becomes a mess when you try to turn the sandwich over.
Heat a skillet over medium heat for a few minutes, drop in a small pat of butter or margarine (just enough to coat the skillet. You're not trying to deep fry your grilled cheese).
I usually assemble my first sandwich while the skillet is heating up.
Set the sandwich in the skillet and wait. Patiently. Don't constantly flip it over and over, because all that does is make your sandwich soggy and greasy, not toasted. When the bottom of the sandwich is nice and toasty brown, flip it over carefully so you don't end up with your cheese spilled into the skillet.
Wait... patiently. When the other side of the sandwich is nice and toasty brown, put it on a plate and enjoy! I love to dunk my grilled cheese into my tomato soup. It's so yummy!!
Grilled sandwiches aren't limited to cheeses (obviously). If you want to put other stuff in there, go ahead and try it out. Put a fried egg in there, and have a grilled ham, egg, and cheese. Try different combinations of cheeses. Sprinkle your bread with garlic before you grill it, and put mozzarella cheese in it. It'll be like cheese sticks with marinara sauce when you dunk it in your tomato soup.
I have to stop now. I am getting hungry, and I just had breakfast.
What's in here?
cheap,
Cooking,
easy,
grilled cheese,
home made tomato soup,
simple
Subscribe to:
Posts (Atom)