Showing posts with label baking. Show all posts

Tuesday, August 21, 2012

Stone Fruit Blues and The BEST Cobbler Recipe EVAR

I had the misfortune lately to buy some of the ickiest plums ever.  This followed on the heels of buying some of the ickiest cherries ever.  They are both bland and rather sad tasting, and neither B nor I have any intention of eating them fresh.

Rewind a bit.  Last summer my neighbor Fin gave me a recipe for fruit cobbler that is, in my opinion at least (and everyone who I've fed it to), the absolute best cobbler recipe ever in all of the history of ever.  I've tried so many different cobbler recipes.  They *all* call for some type of canned something in some degree of syrup.  I dislike this for a variety of reasons, but mostly because it doesn't leave me any wiggle room and disallows me the ability to rummage through my fridge to see what might need to get used up.  Also, a lot of those recipes call for the batter to be put on bottom, and as it cooks it's supposed to float to the top through the fruit stuff.  Maybe I am just a baking idiot (which I don't believe), but I've always had problems with the batter not rising through the fruit.  I wind up with a burned mess on the bottom with a layer of raw dough adhered to it, and a mess of gooey canned fruit on top.

This recipe calls for ...  *drumroll*... fruit!!  Ha! Imagine that, if you can.  You cut up the fruit you're using, sprinkle it with sugar and allow it to create its own syrup, then season it (if you like) with whatever you like.  It's fantabulous!  CULINARY FREEDOM FROM CANNED GOODS!!! *looks around sheepishly, gets off the chair, and puts away the wrapping paper tube "sword"*


For the fruit:

3 c of fruit chopped/peeled/pitted/whatever as needed, sugared
1 T corn starch
1/2 c water
1T butter
1 T lemon juice
1/4 c brown sugar - give or take as needed, or use white sugar... or both!  Brown sugar is a bit less sweet and adds richness to the over-all flavor.
Spices and other goodies - allspice, ginger, nutmeg, cinnamon, vanilla, chopped nuts, raisins, dried cranberries, whatever floats your boat - or none at all if that makes you happy.
Amounts of sugar and spices vary based on the fruit and how much help it needs.  This is where being the cook has benefits:  you get to lick the spoon ;-)

Mix the corn starch, water, brown sugar, fruit, and spices in a pot and cook until it starts to thicken.  Depending on how juicy the fruit is, sometimes I will cook the fruit a little bit to draw some more liquid out before I mix in the corn starch.
Add the butter and lemon juice.  I usually skip the lemon juice.  I haven't discovered any real benefit to using it, other than it can help prevent some fruits from changing colors.

Pour it in an 8x8 pan, or a round cake pan.
This is a mix of plums and bing cherries that were a bit past their prime and an apple to make up the difference.


For the dough:
1/2 c sugar
1/2 t salt
1/4 c soft butter
1 c all purpose flour
1 1/2 tsp baking powder
1/2 c milk
* I also throw in a tsp of vanilla, because I like it, and it turns the crust a pretty color.

Mix all of this together until it's smooth.  It will be VERY thick.
Pour over fruit.  I think my friend used the term "pour" loosely.  I end up dropping it with a small spoon to get it to spread evenly.  This is the one aspect of the recipe I find a bit aggravating, but it's totally worth it.  If anyone has a suggestion to make it easier to spread this super crazy thick batter around, I'd love to hear it!


Bake at 350 for 30-40 minutes, until golden and done.


Monday, February 6, 2012

Our Daily Bread

Most of the people I've talked to agree that baking bread is cheaper than buying it.  Most people also agree that it's way better for you, since you actually know what's going into the loaves.  And -- drum roll -- you can pronounce all of it.  I haven't bought a loaf of store bread in over a month.  I think I bought the last one back around the first of January.  I can't vouch for it being cheaper, necessarily.  We eat more bread now, I think.  We eat it for breakfast, lunch, dessert, sometimes at dinner, as a random snack.  It's just that *good*!

I have a recipe that Ms. Terri gave me.  It was for sandwich bread.  It was tasty and simple, but homemade bread goes stale so fast we ended up not eating it all.  I didn't toss it, but it got delegated to the freezer for future use in stews or as breadcrumbs.  So, I went in search of ways to make my homemade bread last longer.
The two loaves made with Ms. Terri's recipe
I stumbled onto this:  Our Daily Bread in a Crock.

If you don't want to follow the link, it's bake as needed artisan bread.  It is SO GOOD!

3 c warm water
1.5 tsp dry yeast
2.5 tsp salt
6.5 c all purpose flour

Yep, that's it,  Four ingredients.  Mix the water, yeast, and salt.  It doesn't need to activate, just toss the flour in on top of it, stir until it's just blended together and pulls into a ball.  You may need more or less water, depending on weather.

Thursday, January 5, 2012

Gramma's Fried Apple Pies, and an Apple Pie, too


Is there anything in the whole world quite so yummy as a good apple pie?  Yes!  A good FRIED apple pie!

My Gramma made the best, and I mean THE BEST, fried apple pies known to mankind.  They were so amazing!!  Mine aren't quite like hers.  Unfortunately no one got her exact recipe, and I don't even know that she had one.  I think it was a dash of this, a taste of that, and this might be good so I'll just put a pinch.  She had this monster of a pressure cooker, and a three foot long rubber spoon that she stirred the astounding batch of apple awesomesauce with.  You could smell them all the way outside, and even though we were thoroughly sick of peeling apples, I don't remember complaining about it.  *note:  I could be wrong LOL Dad would know better.  But peeling apples mean apple pies, and apple pies were worth peeling apples.

WARNING:  This is going to be one of ~those~ recipes, you know where nothing is quite what it seems.  Fiddle with it.  Everyone's tastes are different.

Filling:

1/3 - 1/2 c (give or take) each white sugar and brown sugar.  With Granny Smith apples, 1/2 c wasn't enough, so I added in a little extra for the next batch.
3-4 Tbsp flour or corn starch - I like corn starch better.  It doesn't taste, and it seems to thicken more evenly.
1 tsp cinnamon
1/4 tsp ginger
1/4 tsp nutmeg
1/4 tsp cloves
1/4 tsp allspice
2 tsp vanilla flavoring or extract
1/2 c butter
7c apples peeling and sliced or chopped. - for fried apple pies, chop them small.  For a regular apple pie, it's up to you.  Some people like them sliced, others chopped.  Me?  I don't care as long as it's good :-P

Melt the butter, add both sugars and melt together.  Stir it frequently to keep it from scorching.  Add everything but the starch or flour, and mix in well.  Turn the heat down low and let them stew slowly.  Keep an eye on them, stirring them now and then to make sure they're not sticking.  When they've gotten as soft as you want them (if I can cut them with a spoon without having to press too hard, that's about right) add in the starch or flour, and let it thicken up as thick as you want it.  Remove from heat and get your crust(s) ready.

Double Pie Crust:

2c all purpose flour
3/4 tsp salt
2/3 c shortening or butter (chilled)
6 Tbsp cold water

Combine the dry ingredients, cut in the shortening, add water one Tbsp at a time and mix until a cohesive ball forms.

Divide the dough into two almost equal balls (one slightly larger than the other) and roll out to about 1/4 inch thick.  Put the larger circle in the pie plate, add the filling, and top with the smaller circle.  Fold the edges under and crimp how you like.  Gramma used to use a fork.

Cut a few air vents in the top, and bake at 375 for 30-50 minutes, until it's a nice golden brown.  You can use an egg white wash on the top to make it shiny and pretty and get a better color.

But to make Gramma's fried apple pies, you need biscuit dough.

6c self rising flour
1 - 1 & 1/2 c shortening
1 & 1/4 cup milk

and a little extra flour for fiddling.

Just a note, this is not how I make buttermilk biscuits.  I use more shortening and more liquid.  I think they're too tough like this, but that's the secret.  You have to have tough biscuit dough for good fried apple pies.  Work the biscuit dough till it is a little drier than you want it for biscuits.  (Is this not helpful?  I'm doing my best.)  Normally biscuit dough is kind of sticky and softish.  You want your dough to be not sticky, and a little more dense, like playdough... sort of.

Roll it out and cut circles just like you would for biscuits.  Then roll out the biscuits until they are a little thicker than a pie crust, but thinner than for a sheet cookie.  (I know, I know.. I get more country by the sentence with these instructions!)  Put a couple tablespoons of your apple goodness in the center, fold over and smoosh the edges together.  Now, put a little water around the flattened edge to moisten it, and fold it back on itself so the water helps it stick.

Cook it in a preheated skillet that is only lightly greased (yes, grease.  Not oil.  I don't know why but it makes a difference.  Oil seems to soak right into the dough.)  over medium to medium high heat.  Let it get good and brown on bottom.  Don't fiddle with it!  You'll bust it.  Gently flip it over, and brown the other side.

They are so yummy!

If you don't want to make as many all at once, the biscuit dough can be reduced by 3.

2c flour
1/3 - 1/2 c shortening
3/4 c milk

The apples are perfectly good frozen and thawed later.


Thursday, December 8, 2011

It's that time of year: Pictures, Recipes, and Suggested Sneaky Snacks

 Yep, it's the time when we start dragging out the trees, putting up baubles, lighting the lights, and remembering to be nice a little more often.  I've not been doing such a great job of the "nice" part.  I've been a bit grouchy the past few days, but I've been super excited for almost the past solid month.  I haven't been on my blog nearly as much lately as I generally try to be, but I do have a valid excuse!  Really!  Just keep reading... or scrolling at least.


 Li'l bit lurking under the tree.  She has a new set of catnip toys under there.  And B and I.  Fin was nice enough to come take a picture for us.  :-)
 But THIS is the reason I've really been so absent.  Yes, wax is the culprit.  See, if you take 1/3 of one of those bars of paraffin, and 12 oz of chocolate (either chips or chunked up bars), and you use it to dip stuff in... magic happens!!!

 Like peanut butter balls!!  Graham cracker crumbs, peanut butter, and powdered sugar, rolled into balls, chilled, and then dipped in chocolate/wax goodness.  Oh yes....  I'm sorry, I can't be more specific.  This recipe isn't mine to give away.  It's my Great Aunt D's, and my cousin (her granddaughter) was generous enough to share it with me, along with a very special recipe for hard candy.
 This hard candy brings back so many childhood memories.  Unfortunately, I didn't use the right type of flavoring, so it's on the bland side.  It also appears that using a non-stick pot is bad news bears for hard candy.  Maybe it doesn't heat as even?  I don't know, but it doesn't taste quite right.  Ivy is reporting recipe tweakings to me, so that we can continue the tradition of Aunt D's famous hard candy.  :-D  My cousin ROCKS!

I don't think the paraffin/chocolate idea is proprietary, though.  And once I realized how easy it was to make dipping chocolate that would harden right... well... here's what happened!  To make anything you see below, just melt the chocolate and the paraffin wax together over low heat.  Once it's melted, just dip whatever you want.  A fork works best to retrieve things you dipped in all the way (like the cracker/peanut butter goodies).  A slotted spoon messed up the chocolate coating on the bottom.  The treats just slide right off the fork no problem.

For the drizzles, I used the same chocolate and wax mixture.  I just dipped a fork in and sort of slung chocolate onto the treats.  Amazingly, I didn't wind up with chocolate on the ceiling ;-)
Chocolate dipped pretzels, and peanut butter and ritz cracker sandwiches:  The white chocolate edition. 

 Dark chocolate dipped pretzels with sprinkles!

White and milk chocolate mixed together became a drizzle, and a medium for dipping broken up bits of the pretzel rods.  And graham crackers got dipped and drizzled, sprinkled and coated.  

The milk chocolate edition of the peanut butter and crackers, and the fully dipped grahams.

And then, of course, the Pup's present.  I turned the graham cracker box inside out and decorated all four sides.  It's got a sampling of the chocolate dipped goodies, and some smaller bite sized bits that I tried to mix together to look like kibbles and bits or puppy chow.  I also made a batch of puppy chow.

Puppy Chow
Chex (or chex like) cereal
1/2 c peanut butter
1/2 stick butter
1 c chocolate chips
1 tsp vanilla
Powdered sugar

Melt the butter, peanut butter, and chocolate.  Mix in the vanilla after everything has melted.  Toss the cereal in it, and then toss the cereal in powdered sugar.  Ta da!  Puppy Chow.  Soooooo good!

And he had to have something to eat all his goodies out of.  I doodled all over the sides.  Yes, he will actually play with the squeaky bone, if for no other reason than to aggravate B LOL :)

And of course we had to have cookies.  Unfortunately, the icing job was pretty shoddy.  I was experimenting with my own icing.  It's just milk and powdered sugar mixed together till it's the right consistency.  I apparently didn't have it quite right, because it sort of oozed off the cookies.  But, now I know better for next time, and it still hardened up just like it was supposed to once it sat.  

 Sprinkles!!

The cookies are Spiced Sugar Cookies.   I found the recipe HERE.  They were really easy, and taste similar to snickerdoodles.


Last, but Oh -- Em -- Gee not least:  Peanut Butter FUDGE!  Oh boy, that stuff is awesome.  It didn't turn out *quite* right.

4c Sugar
1c Milk
1/2 c Butter (1 stick)
7 oz Marshmallow Creme
12 oz Peanut Butter
2/3 c All Purpose Flour

Ok... when I read that recipe, I was thinking that there are 8 oz in a cup, so that is a cup and a half of regular peanut butter.  The fudge didn't quite set up.  It's very soft and squishy, so I am thinking that should be peanut butter chips.  However, it doesn't matter that the fudge is squishy, it is Amazing!  Yes, capital A.  So good!  I'd never made fudge that worked before.  This was too easy, and too yummy.

Sugar, milk, butter goes in the pot.  Melt the sugar and bring it to a boil.  Stir constantly while the sugar is melting, but then don't stir it anymore.

Let it boil for five minutes.  Then remove it from the heat and mix in the marshmallow creme and the peanut butter or peanut butter chips.  Very slowly stir in the flour, and pour it into a buttered 9x13 baking dish to cool.  This stuff is so good, I am only allowed to make it at Yule from now on.  We can't walk by without grabbing a piece.

Wednesday, June 1, 2011

JUNE!!!!!

June!  It's June!  June! June! June!

For the record, I despise summer with a vehemence that only the fair complected and heat intolerant can truly appreciate or accomplish.  I burn in five minutes flat and start to get tunnel vision if I'm outdoors very long.

But this year, June is the best month EVER!  I can count on one hand the number of weeks it will be before I can see B again!  I'm so excited!!  (As if the superfluous use of exclamation points didn't give that away at all?)

But I'm starting to feel the time crunch.

Where I currently stand:

The table top has been sanded and stained.  The black walnut combined with the original dark blonde of the wood to make a really gorgeous combination.  I sanded down and stained the pedestal, repainted the platform that the table top sits on, drilled pilot holes for the new supports, and sanded down two of the four chairs, and repainted one before I ran out of paint.  When I went to actually screw the screws through the new supports and into the bottom of the table top, for some reason the screws don't want to go through the wood of the table.  I've started stripping the head, but making no downward progress.  That might end up being something B has to finish for me.  Maybe I just don't have enough downward pressure.  But, I've bought more paint, so I can move forward with that project again once I have another free day.

Yesterday, I didn't make as much progress on anything as I intended.  I mixed up the dough for my Hero Cookies, but my ambitions were greater than the time I had.  I mixed up approximately 7 quarts of cookie dough.  It took *ages*, because I started to burn out the second hand mixer I've bought since January.  My friend Terri suggested that, if I can squirrel enough away while I'm still working, I should invest in a stand mixer.  I've always wanted one, and I know they're very versatile and a huge time and effort saver, but I've always been put off by the huge price tags on the brands with the best consumer ratings.  She assures me that it is worth every penny, though, so I am going to start shopping around to see what type of price ranges I can find for both durability and power.  When I finally got the flour completely incorporated into the butter/peanut butter mixture, it was already nearly 10 pm, so I rolled the dough into logs, wrapped them in waxed paper, and froze it for later.

Today, I went to the river with my best friend and her dog.  It was hot, but the water was wonderful, and if you could find a nice spot to anchor your feet and lay back into the current in the shallow water, it felt like one of those aqua-massage tables.  Only the river is free *grins*.  When I got home, I went down to the shop and put away the table/chair project and straightened up some of my clutter.  I won't be able to work on it tomorrow or the next few days, because I have a dentist appointment in the nearest large town (about 50 miles one way), so that is going to me most of the day shot right there.  And, my sister-in-law contacted me today to tell me that she's sending me two transcripts tonight, and one almost every day for the next five days!  That is going to be excellent.  I usually end up with a tension headache from the typing, but it means some extra income to sock away in preparation for my upcoming unemployment.

After I'd straightened up some, I pulled out one of the containers of dough logs to bake for B's homecoming.


The cookies have defied physics!  There were about 6 qts of both butter batter and flour.  Slowly, carefully and time consumingly, I incorporated all the flour into the butter batter, then even managed to add chocolate chips.  That took hours.  But, I finally managed it, lol.  

Today, when I thawed out the dough, I cut it into chunks.  
 They baked up great. 


After I finished  baking them, I wrapped them in waxed paper, put them in baggies, and tied each baggie with a red, white, or blue ribbon :-)


They're currently in air tight storage bins double-sealed with saran wrap and tucked back in the freezer.  They'll be as fresh as they were today when he finally gets here.

I can't wait!

Sunday, May 29, 2011

Cigars, cigarettes,.... Cookies?

What is it about the 30's and 40's that is so classic, classy, and yet very sexy?  They weren't anything near as revealing as our modern day sex symbols, but when I like of sexy those time frames are the first things that pop into my head.  Pin-up girls and cigarette girls, to be more specific.  That time frame in history was also very patriotic.  The whole country was unanimously rallied behind out troops.  Pamphlets like "Cooking for Victory" and "Make do and Mend" were being distributed.  Hair styles reflected this, too with "Victory Rolls" or "Victory Curls", and Rosie the Riveter, an icon encouraging women to step up and aid the war effort from home, still holds a place in, if not pop culture, counter-culture.

So, when my imagination started wandering toward things to do for B's homecoming, it automatically started skipping happily toward that era for ideas.

Have you ever heard the phrase "You get a hero cookie"?  Maybe it's just a local colloquialism, I don't know.  My dad used to say it when one of us did something above the bare minimum without having to be told to.  But there never was any cookie.  It was just a turn of phrase.  But what if there was a hero cookie?   A super yummy, chewy, gooey, homemade stack of cookies?

Backtrack a little bit:  Cigarette Girls.  I got side tracked.

I love it!  Why?  I don't know.  I just do.  I want legs like that!!  Hmm... sorry, side tracked again.

So, now we've got the idea of hero cookies, and we've got the sexy iconoclastic image of the cigarette girl in our heads.... and we moosh them together.  That became the basis for my idea.  Instead of cigars, cigarettes, and programs, I'll be giving away "hero" cookies!

Earlier this summer, I went clothes hunting with some friends.  We went to a place in Atlanta known as Little 5 Points.  It's basically counter-culture heaven.  It's also home to some of the coolest second hand and consignment shops EVER!  You wouldn't believe the stuff you can find there!  And I found this amazing dress.  Think Marilyn Monroe's white halter, but shorter and black.  It falls just a little above the knees.  And to finish it off I found these adorable peep toe pumps.  The dress was all of $14, and the shoes were $30.  If I'd bought the outfit brand new, it would've cost more like $90 instead of $45.  Total score!

But, where in the world was I going to find a cigarette tray?  And, what was I going to use to advertise the contents of said tray?

Insert a trip to Hobby Lobby.  Yes, I know, hobby and craft stores are often way more expensive than necessary, but I was careful.

Nearly everything was on sale.
The three little American flags were 3/$1
The three spools of ribbon were 3/$1
The three bottles of paint were 3/$1
The two small wooden stakes were .30/ea
Theres a galvanized tin watering can/coffee pot back there in the back.  It was $2
The wooden forms were $3/ea
The craft paste, bag of pebbles, paint brushes, and the cellophane goodie baggies were the most expensive.
The pebbles were $3, the brushes $5, the paste $2, and the goodie bags $3.

But, the paint brushes can be used again, the tin will probably become a toothbrush holder in my bathroom, or a utensil holder in the kitchen, and the goodie bags... I was willing to pay for convenience and looks.  I didn't want to have lumpy, mal-formed packages of cling-wrap wrapped cookies all over my tray.  I wanted it to look neat, and pretty, and well put together for our boys when they come home.  Each baggie will have a few cookies in it, and be tied with either red, white, or blue ribbon :-D  It's going to be awesome!

But, first I have to turn this pile of goodies into an advertisement.


 First things first:  base coats of paint on the forms.
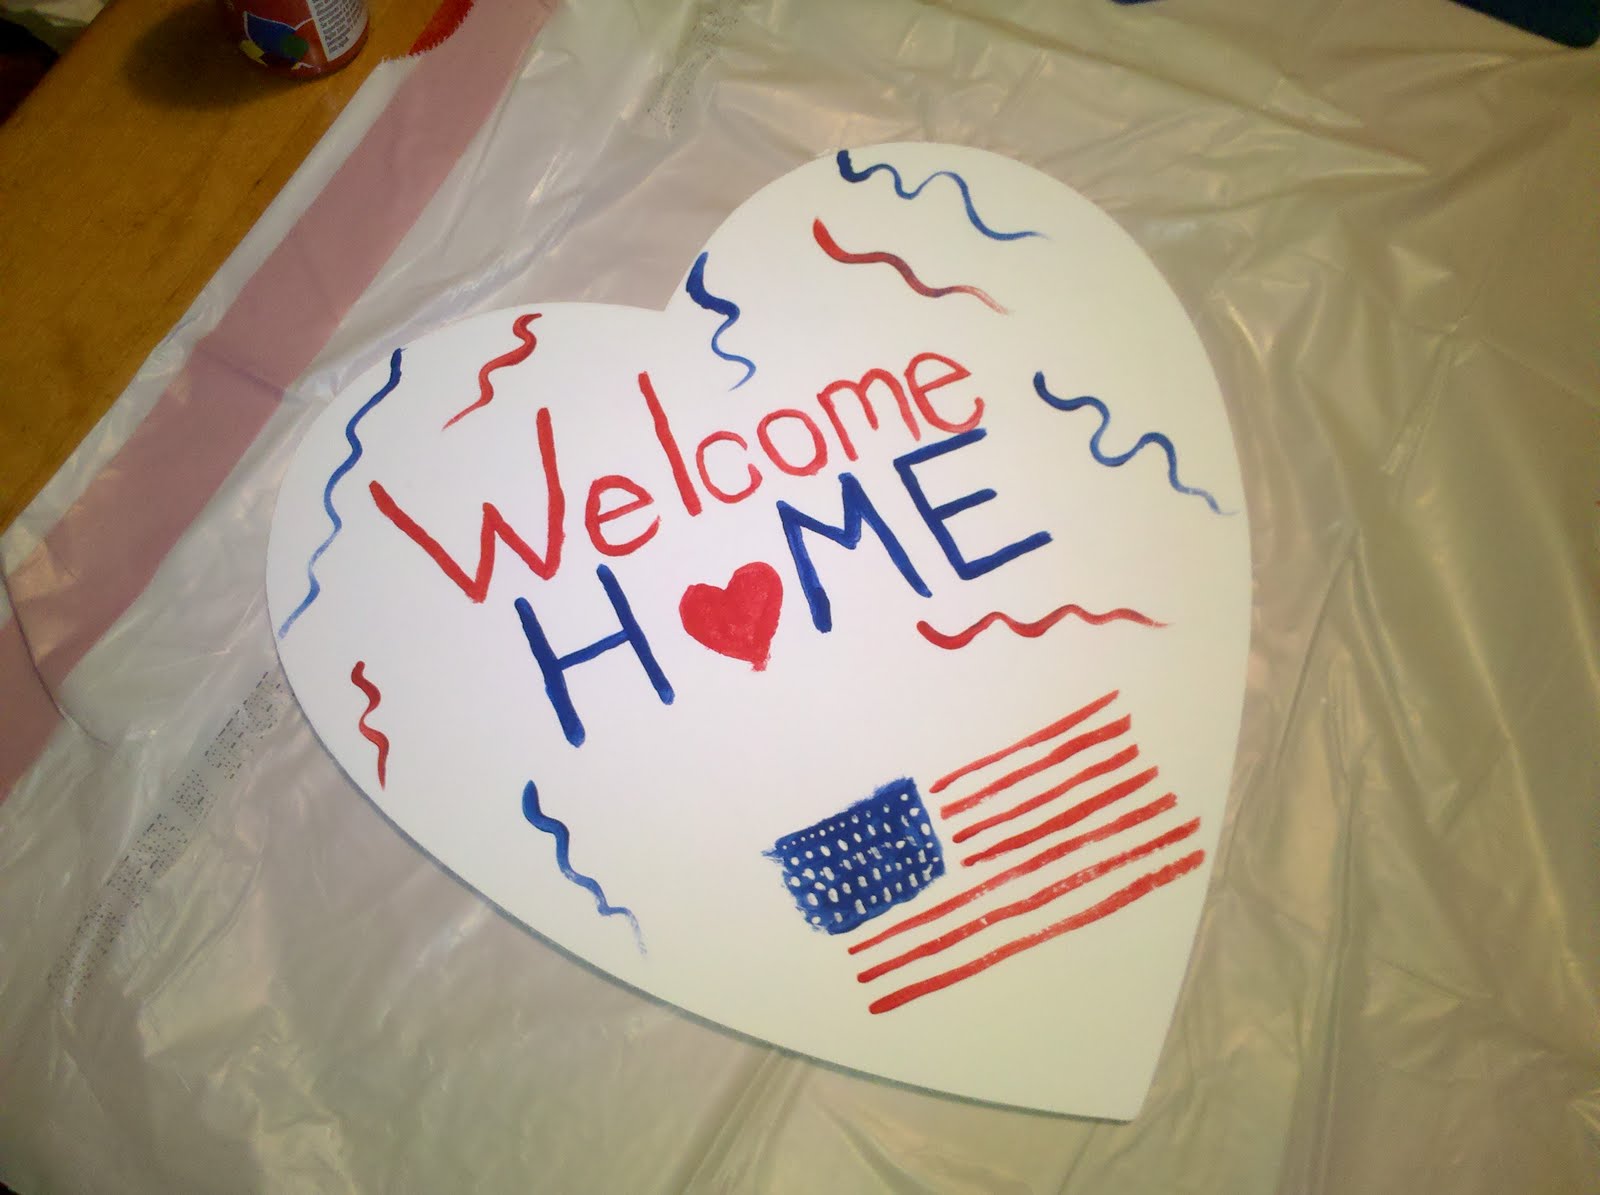
Then I had to paint them up cute.  Unfortunately, my handwriting is awful with a pen/pencil.  Paint is even less cooperative, so my letters don't look nearly as neat as I would like.  But I'm thinking that the redeploying soldiers aren't going to be very persnickitty about the neatness of my lettering.  I was careful to put 13 stripes, in the correct order, and 50 stars on my little painted flag, though.
 This is a better example of the atrocity of my painted lettering.  HERO looks awful.  But, again, it's not a professional job, and I am confident my cookies will knock their combat boots clear off!

I'll add the day's date on the other stake once I find out what it actually is going to be.  I'll most likely be taking paint and brush with me to paint the night before.  Luckily, the paint dries literally in minutes.

Final phase of sign assembly:  letting the paste set.  The craft paste I used said it dries in minutes, but to allow several hours for a solid bond.  So, I squashed my signs under some relatively heavy objects over night.


I arranged the signs and flags in my little tin pot, and filled the pot with the pebbles to hold everything in place.  I guess I could've gotten pebbles from the creek, but I didn't think of that until after I'd already gotten home with my bag of goodies.  Ta da!  This will sit on the back of my tray.  But, I had to figure out how to get a tray.  I thought of going back to Hobby Lobby to see what types of serving trays they had, but I really didn't want to pay their prices or spend the gas money it would cost to drive almost 100 miles round trip.

I Googled all kinds of trays.  Still didn't like the price tags that were being put on what is, essentially, the bottom of a box.  So, I went to the go-to gal for all kinds of wood working and minor carpentry:  my step-mom.

She gave me a piece of her scrap lumber to use, and even marked out the cuts for me (for which I am very grateful).  I would've figured out how much leeway to leave on the ends of the side boards to make my sides frame up right, but I would've probably messed it up at least once.  Her help made the project go right the first time, so no wood was wasted.  I have my own power tools, and I actually do know how to use them!  So onward to the next phase of the project!

 The rectangle up top is going to become the bottom of the tray.  It was a stray piece mom had laying around that just happened to be about the perfect size.   The board at the bottom will become the sides.  A square rule, measuring tape, pencil, and hammer are going to be pretty much all we need to make this thing happen after we get the board cut.
I figure everyone here knows how a box is shaped, so I didn't take progress pictures of nailing the tray together.  The various sides of the tray were nailed on with about 1/2 inch of overhang at the bottom to act like risers in case I needed to set the tray on the ground or something.  Mom said it'd be best to do that, since the homecoming is outside.  If the ground is damp, my whole tray bottom won't get damp, just the bottom edges of the side boards. 
 Mom suggested using cookie cutters and a jig saw to cut out cute shaped handles in the sides.  But I don't have a jig saw, per se.  I have a reciprocating saw.  Unfortunately, my brother-in-law borrowed it, and now none of the blades are anywhere to be found.  I didn't fancy trying to carve out cute shapes with a reciprocating saw anyway.  What I *did* have was auger bits for my drill.  I guess that's what they're called.  Boring bit... something like that.  It cuts a plug out of the wood, instead of just drilling a hole.  I sanded the insides of the holes with 320 grit sandpaper so they would be nice and smooth and wouldn't fray my cord.
*insert catchy jingle music here*  Assembled, now it needs paint.  (Now that the project is actually completed, I kind of wished I'd stained the wood instead of painted it.  I think it would've been prettier.  But hindsight, 20-20... you know)
 This looks a bit yellow in the pictures, but it's more of a creamy color.  It reminds me of buttered toasted bread.  Not bread buttered with margarine, but real butter, then toasted under a broiler to make it that yummy creamy gold color.  I shouldn't be typing this while hungry...
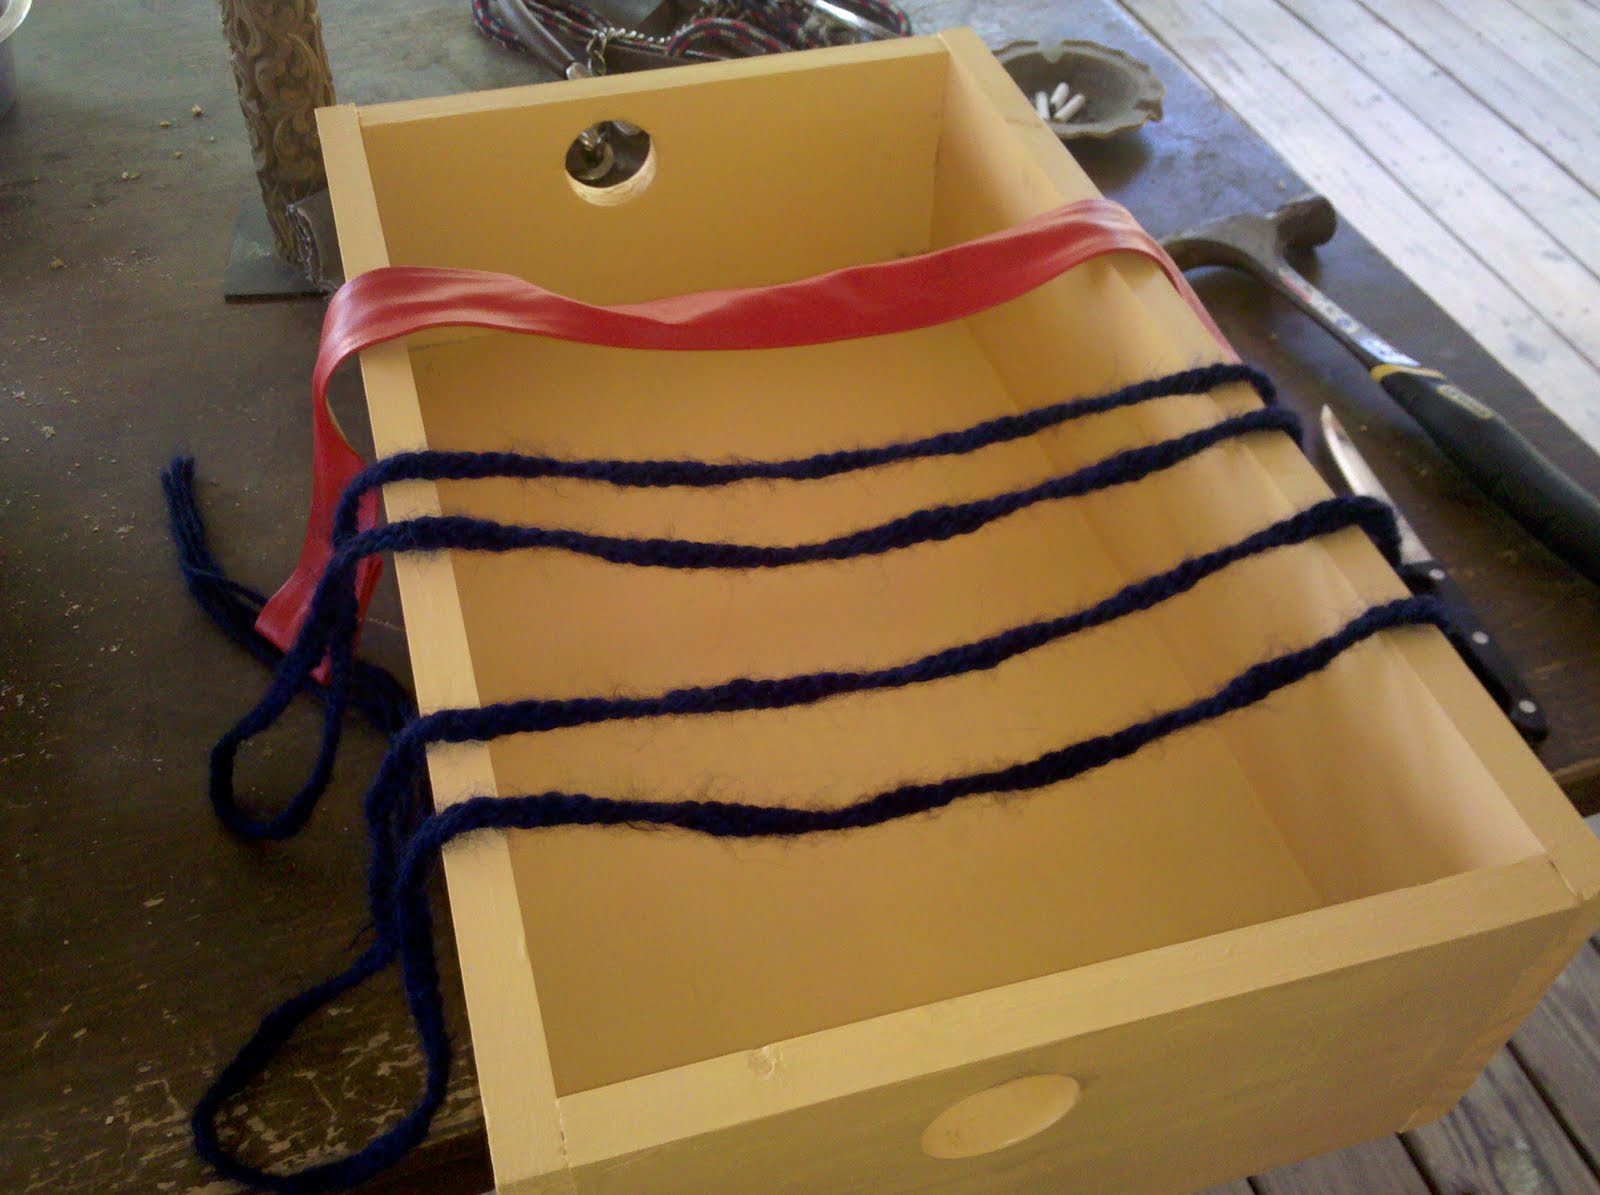
When B came home for his R&R in January, I had him a present waiting.  It was a scarf and hat made from baby alpaca wool.  The yarn was this amazing blue.  The colorway said "navy", but this yarn is no more true navy than I am true white.  It was multi-faceted with indigo, navy, royal, electric, baby, lilac, violet, and all kinds of other various shades of blue and some purples imaginable.  All together, it makes this intense, rich, lovely blue that I can not capture on my camera to save my life.  I've tried.  I had just a tiny bit of yarn leftover, and I never throw away perfectly good yarn, not ever!  So, I cut what was left into lengths about 2/3 longer than I was going to need and wove it into a cord.
 I also found a piece of red leather-ish stuff that might once have been a belt.  I folded the ends over and stitched loops into them, then tied off my cord in two places in the middle so I could cut it.  The cord was doubled, then looped through one of the neck strap and one handle of the tray they way you would loop a brace of rabbits together to sling over a saddle horn.
 And so.... I have a cigarette tray :-)

All that's left is the cookies!

P.S.  I hate these bathroom mirror pictures, but I'm alone quite a bit.  I didn't have anyone to take pictures for me.  But!  My sister-in-law will be back in town in a couple of days, so I am thinking about getting dressed up in my homecoming get-up and talking her into taking pictures.

This leaves us with one final question.  What is a Hero Cookie anyway?  I guess, in theory, a hero cookie should be exactly what the hero in question wants it to be.  But there's no way in the world I can make a different cookie for every redepoloying soldier, and I want to bring enough cookies so that every one of them can get some, if they want to.  Since there's really only one solider that's MY solider, he's the hero my cookies are going to be tailored for.  He loves ... ok he LOVES peanut butter.  He'll eat it by the jar, with a spoon, with nothing to go with it.  During the early part of the second half of his deployment, he was chatting with me on MSN messenger.  the conversation went something like this (I know I've forgotten bits, but these are the essential bits.  I specifically remember him goading me by hinting I might not be able to one-up her lol):

B - I have a challenge for you, if you're up to it.
Me - Oh yeah?
B - Yeah, my pilot's wife sent these peanut butter chocolate chip cookies.  They were really good.
Me - Ah, ok.  You want me to show her up huh?
B - Well, only if you think you can.  I mean... these were some damn good cookies.  Probably some of the best I've had.
Me - Uh huh.  Challenge accepted.  Wait about two weeks.

It takes about two weeks for mail to reach him, and I remember him mentioning how soft and chewy the cookies were that the pilot's wife sent.  So, they had to be good and gooey so they wouldn't dry out and be crunchy when they reached him.  Here's the recipe I used.  B said that the people who were lucky enough to snag one said they tasted like love mushed up and baked.  He said mission accomplished lol

1/2 c butter, softened
1/2 c peanut butter
1 c brown sugar, packed
1/2 c regular sugar
2 eggs
2 Tbsp light corn syrup
2 Tbsp water
2 tsp vanilla extract
2 & 1/2 c all purpose flour
1 tsp baking soda
1/2 tsp salt
2 c semi-sweet chocolate chips or chunks

Preheat oven to 375

Cream together the butters and sugars, then add the eggs one at a time.
Stir in the corn syrup, water, and vanilla.
In a separate bowl, combine the flour, soda and salt, then stir slowly into the butter mixture.
Add the chocolate and stir.

Bake on an ungreased cookie sheet.

I do NOT recommend using an electric mixer for mixing in the flour and chocolate, unless you are fortunate enough to have a countertop/stand type.  This dough gets really thick.  I accidentally broke my hand mixer on these cookies.  If all you have is a hand mixer, use a spatula or just your hands.

I rolled mine into balls a little smaller than ping pong balls and baked them for about 9-12 minutes.  As soon as the bottom edges start to turn golden, pull them out.  Let them cool on the cookie sheet for a minute or two before trying to move them.  Don't stack them until they are completely cool.  They stick together.

These cookies are the height of gooey goodness.  They can be cooked a little longer to have a firmer bite.